Hatching Chickens
There truly is an art to hatching your own eggs or raising day old chicks that you have bought. Below you will find tips and tricks to help you decide which direction you might like to go in.
Starting your own flock from scratch.
Will you hatch under a broody hen or artificial incubation? With incubators there are many important factors to consider. Generally these factors can be divided into three categories: choosing the right eggs, selecting an incubator and maintaining proper incubator conditions.
If you decide to go natural with a broody hen things are a little less complicated. The other alternatives are buying in already laying hens or point of lay pullets.
Affordable incubators can be home made, or bought from Incubators New Zealand to check out their website click here.
If you’re looking for fertile eggs from a variety of breeds check out Fionna and Gordon’s website: www.chooks.co.nz.

Broody hen
If you’ve opted for the natural choice of buying a broody hen, or you already have one, that is a great place to start. You can buy fertilised eggs, let her incubate her own or set a mixture of your backyard flocks eggs for her to sit on, hatch out and raise herself. As a general rule a good sized hen will be comfortable on 15 eggs.
You can also incubate Cortunix Quail eggs under a bantam, and a larger hen will happily sit on and hatch out duck eggs, though she might get a little upset when her precious babies take to the water. Chickens will also sit on Pheasant, Guinea Fowl, Pea Fowl, Turkey and some larger hens may sit on Goose eggs.
There is no beating a mother hen when it comes to hatching and raising chicks. To tell if your mother hen is is clucky/broody is easy, she will stay on the nest almost 24 hours a day, depending on the hen, she may get off for 30mins to 1 hour, this is natural. For the first few days she may get on and off the nest irregularly, if this happens she is not 100% brooding.
It’s important to set eggs all at the same time so the chicks inside all develop at the same rate. If you’ve ordered eggs or are collecting eggs to set at the same time a good way to keep a hen clucky is by placing golf balls or egg sized stones under her. You can also purchase fake eggs for this purpose from some pet shops, farm and rural supply stores. If you’ve ordered some eggs and they’re coming through the post it is a good idea to rest the eggs for about a day so the egg sack inside the egg can return to it’s normal size and the embryo can settle.
To set eggs under a clucky hen is fairly easy. This must be done at night. Pick her up, move her to one side, remove Golf balls or fake eggs and set the desired eggs! Try not to disturb her too much during incubation which could cause her to abondon the clutch.
After incubation usually 20-21 days the chicks can be fed starter crumble. Make sure the mother and chicks have access to water that isn’t too deep for the chicks to fall in and drown.
Incubator
Choosing the right eggs:
If you’re buying eggs in, try to buy from someone who sells large amounts of fertilised eggs, or if buying off TradeMe, buy from someone with good feedback about past egg sales, as they would have done most of the work for you. If you have bought your eggs and they arrive through the mail be sure to rest the eggs for about 24 hours before setting in an incubator. If setting your own, select eggs from healthy birds, of regular shape and size, that are clean with no cracks or holes as such damage will cause complications or death further down the track.
– Be sure not to wipe or wash your eggs as this will remove their protective coating.
– Store the eggs in a cool, humid area at room temperature or about 13°C with the large end up.
– Turn the eggs daily, a good idea is to draw an X and an O on opposite sides of the egg to keep track, or, if you are creative and have children draw smiley faces on one side and turn the eggs face-up and then face-down.
– Turn the eggs an odd number of times each day. A minimum of 3 times is sufficient.
– The eggs can be stored for a maximum of 14 days. Though a maximum of 7 days is recommended. Warm the eggs slightly, e.g. in the hot water cylinder cupboard to raise the internal temperature before placing them in the incubator. Never keep them in your refrigerator!
Selecting the incubator:
There are pros and cons for each of the many different incubators.
Make Your Own Incubator

Incubators can be expensive, so consider building your own. Whilst there are many free plans out there on the internet, you dont want to trust your precious eggs to just anything. Conditions in an incubator need to be stable and reliable. Commercial hatcheries have advanced humidity control systems, automatic egg turners, come with a hefty price tag, not to mention probably hatch more chicks that you could possibly squeeze in.
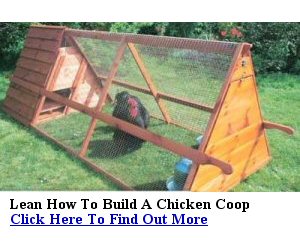
The Incubator Maker“>Incubator Maker was designed by a High School Science teacher for his students, with parts from the hardware store. (And the instructions come with a bonus set of chicken coop plans, in case you havent gotten that far yet).
Buy an Incubator
Incubators New Zealand sell both types of small incubators reviewed here – The Still Air and the Forced Air Incubator.
The still air incubator is the cheaper option, the air inside is usually warmed by a heat tube. Still air incubators often come without an egg turner, so eggs must be turned manually about 3 times a day to stop the embryo sticking to the side. Although they do a sufficient job sometimes Still Air incubators have heat spots, due to the air inside having little or no movement. It is important before setting the eggs to rigorously test for consistency in the internal temperature.
Forced air incubators have built in fans that move and rotate the air inside, this creates a far more even distribution of heat. These can come with egg turners but some don’t so eggs still must be turned by hand.
It is recommend to purchase a new incubator as this guarantees your incubator will be clean, hygienic and in perfect working order. People will often try to sell second hand incubators at high prices but why pay an inflated price for something second hand when brand new is only a few dollars extra?
Maintaining the proper incubator conditions:
The temperature for a forced air incubator should be around 37-38°C and for still air incubators around 38-39°C. Make sure to check the temperature daily. Ideally humidity should be around 58-60% from the first day until the 18th day and then 65% from day 18 onwards which is important to stop moisture loss from the eggs as they are about to hatch. Air vents should be opened slowly as the chicks begin to hatch to ensure proper ventilation. Always make sure you have clean hands before handling the eggs and never aid the chicks with hatching, they must do it all by themselves.
Chicks should be hatching around day 21, after day 25 or 26 discard any remaining un-hatched eggs.
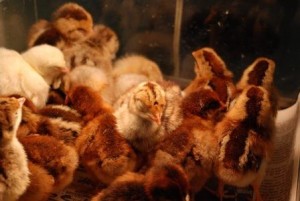
Raising the chicks
Chicks should be left in the incubator for about 24 hours to dry and fluff up. There is no harm leaving them in the incubator for up to 48 hours as just before they hatched the remaining yolk would have been drawn inside them and they can happily live off that for a day or two.
As soon as they are ready, they can be moved into a box with sides at least two feet high. Cardboard boxes are sufficient and should be kept in a draft free area out of direct sunlight.
Try to eliminate sharp corners of the boxes by placing and taping curved cardboard in the corners. If chicks get frightened they will huddle together in a corner and sometimes can be smothered and die, it is harder to do this if there are no true corners.
The heat lamp should have been turned on a day or two prior to moving the chicks in, making sure to check the temperature and adjusting the heat lamp accordingly. The temperature needs to be about the same as the temperature used in incubation, so about 37°C. The chicks will soon let you know if the temperature is too hot by moving away from the heat lamp or too cold by huddling under it. As the chicks get older the heat lamp can be moved further away from them.
For the first few days it is best to line the box with paper towels or similar as the chicks are still learning what food is and what food isn’t. Litter or sawdust will be pecked at, sometimes consumed and can be deadly. Don’t line the floor with anything slippery as the chick’s legs won’t be strong enough at first and this can cause complications such as straddle legs which is where their legs grow sideways and make it impossible to walk.
When moving the chicks to the box some people like to gently dip the chick’s beaks into the water so they learn faster where the water is.
You can purchase starter crumbles from rural supply stores, farming stores and feed stores, which is sufficient for starting the chicks off. It is a good idea to put the feed directly on the paper towels for the first day or two as chicks will peck at anything by their feet, just until they have learned what food is and then start using shallow dishes. Never let the food get wet or damp. Fungus can grow rapidly in these warm conditions and could poison the chicks.
Make sure they have 24 hour access to food and clean water and that the water is not deep enough for a chick to drown in. Using a shallow container with marbles in it is often a preferred choice as chicks have tendencies and urges to jump into liquid. This is presumed to come from the chicks spending their first 21 days of life in liquid.
Contact us if you think we’ve missed something here.